An I-cord is a good skill for every knitter and has a multitude of uses. It can be used as a drawstring, a decorative ribbon, closures for a sweater or a bag, or even jeweller on it’s own! The product we’re making in this video is the Knitting Me Softly necklace.
https://www.jimmybeanswool.com/secure-html/onlineec/instructionalArticle.asp?iaid=108
Has a video showing how to make an applied icord. This site has many other stitch tutorials.
To make an i-cord:
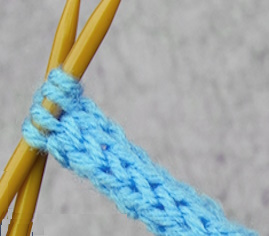
- Cast on the number of stitches called for in your pattern and then pick up one stitch from the edge of the garment. Jeanne is using a 3 stitch Icord plus one stitch that she has picked up on the edge of the swatch she’s applying the i-cord to. So her complete i-cord will contain 4 stitches.
- Start your Icord by sliding your stitches back to the end of the needle where you started your cast on, then bring the working yarn across the back of the stitches and knit the firststitch that you cast on. Knit across until there is one stitch left making sure to pull the yarn tight on that first stitch.
- When you get to the last stitch before the end of your needle, slip the stitch onto your right-hand needle, pick up a new stitch from the main body of your work, slip the last stitch back to your left-hand needle and knit the new picked up stitch together with this stitch.
- Slide the work to the other end of the needle and repeat the process as many times as is needed to complete the I-cord length you desire.
- If your icord is applied to a straight edge, finish the i-cord by binding off normally. If your project has the icord completely around the edge you may need to graft the two ends together.
Posted by Laura of Jimmy Beans Wool